V
Vanja Šević
Guest
Even though you start off playing Tower Blitz with only one type of tower, during your gameplay you unlock more and more towers, all with their respective perks and flaws. In order to choose the best strategy for your play style, here’s a complete tier list of all the towers in Tower Blitz.
Table of contents
All Towers In Tower Blitz Ranked
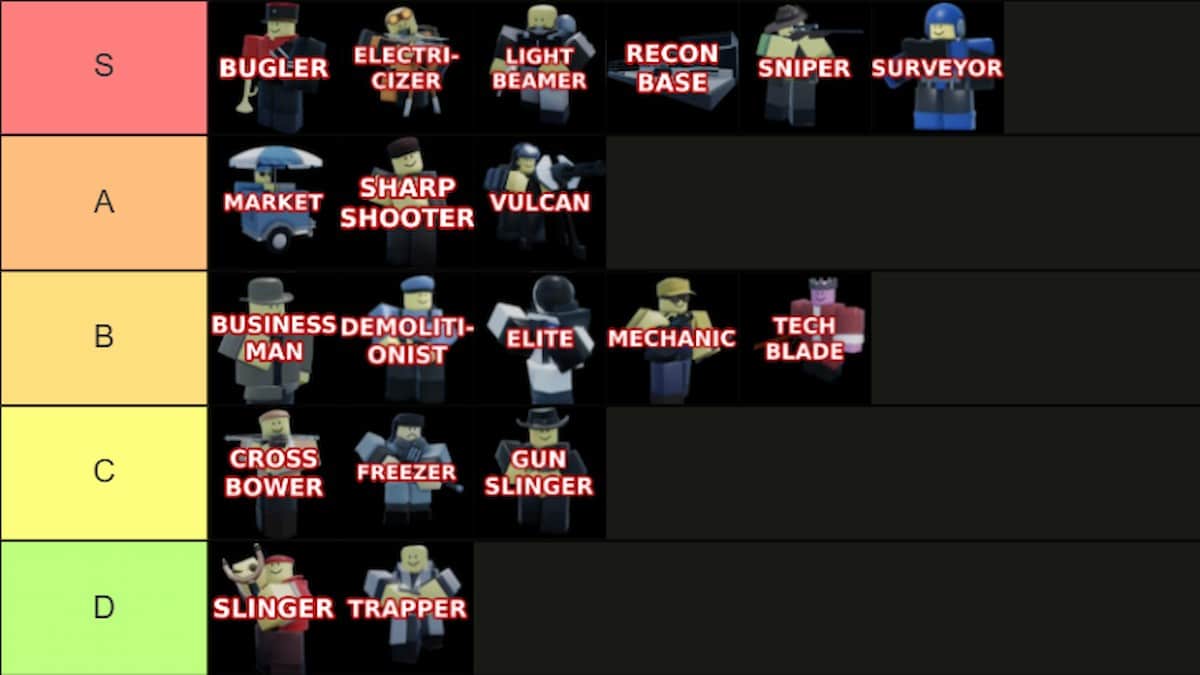
Image by The Escapist.
We’ve sorted all the towers in-game from S-Tier to D-Tier, based on their abilities, top and bottom paths, cost, and efficiency. S-Tier towers are the best in the game, the ones which almost guarantee you a win on any map (if you use them correctly, that is). A-Tier towers are still good, but with certain flaws that separate them from the highest tiered towers. B-Tier towers are quite average, not great but not terrible either. C-Tier towers are essentially bad towers with a few perks that some players might be able to use to their advantage. D-Tier towers are the worst in the game, and serve almost no purpose at all. You’ll find our explanation of the rankings below.
S-Tier Towers
A-Tier Towers
B-Tier Towers
C-Tier Towers
D-Tier Towers
Now that you’ve seen our tier list of all the towers in-game, you have everything you need to find the best strategy for your play style. If you need a little head start in the game, our Tower Blitz codes can help you out.
Click here to view the article...
Table of contents
All Towers In Tower Blitz Ranked

Image by The Escapist.
We’ve sorted all the towers in-game from S-Tier to D-Tier, based on their abilities, top and bottom paths, cost, and efficiency. S-Tier towers are the best in the game, the ones which almost guarantee you a win on any map (if you use them correctly, that is). A-Tier towers are still good, but with certain flaws that separate them from the highest tiered towers. B-Tier towers are quite average, not great but not terrible either. C-Tier towers are essentially bad towers with a few perks that some players might be able to use to their advantage. D-Tier towers are the worst in the game, and serve almost no purpose at all. You’ll find our explanation of the rankings below.
S-Tier Towers
| Tower | Cost | Explanation | Pros and Cons |
|---|---|---|---|

| To unlock the tower: 2500 Tokens (available at Level 25) To place in-game: 750 Cash | Overall, OP. Even though it’s a completely support tower, you’ll probably struggle in Expert without it. Works wonders however you use, especially if you know which towers to pair it with. Keep in mind Bugler cannot buff Recon Bases. | + Gives a huge boost to all other towers’ performances + A must in Expert – Exclusively a support tower |
| To unlock the tower: 5500 Tokens To place in-game: 3800 Cash | If you like using a Sniper but need something a bit more hardcore, this is the tower for you. It has the largest range and damage of all the towers in-game. Place it near the end of the map and enjoy the shredding of all enemies that approach it. | + Huge power and range + Both support and damage oriented – Expensive |
| To unlock the tower: Complete the contract To place in-game: 1800 Cash | Similar to Electricizer, Lightbeamer is definitely one of the strongest towers in-game. Setting him up facing a straight part of the path is a recipe for success, considering his death ray can destroy just about anything. Both paths are incredible, and this tower can carry your game if you find it a good placement. | + Incredibly strong + Great for crowd control – Not viable in early-game -Expensive |
| To unlock the tower: 8000 Tokens (available at Level 45) To place in-game: 1000 Cash | You get so many units for the price of one. As soon as you put it down, Recon Base spawns operatives who fight on your side, and they only get buffed as you upgrade the tower. We prefer the top path, but the bottom one is great as well. Even though expensive, Recon Base is the key to an easy win on any difficulty other than Normal. | + Continually spawns units + Both paths are OP + Perfect for Expert – Crazy expensive upgrades |

| To unlock the tower: 1500 Tokens To place in-game: 500 Cash | Without a doubt the best early-game tower. Some consider it slow, but this can be fixed by taking the bottom path. What makes it different from other early-game towers is that Sniper is very usable, if not necessary, in mid and late-game, especially on Expert. | + Best early-game tower + Can be used throughout the game + High piercing damage – A little bit slow |

| To unlock the tower: Complete the contract To place in-game: 700 Cash | This tower can essentially do anything. If you want the Surveyor to be a support tower, take the top path. If not, take the bottom path. Everything in between is up to you and your gameplay. Either way, you can use it from start to finish and it will play an important role in your round. | + Versatile + Can be used from start to finish – Only 4 can be placed |
| Tower | Cost | Explanation | Pros and Cons |
|---|---|---|---|

| To unlock the tower: 1000 Tokens To place in-game: 650 Cash | An overall great tower – if you can figure it out. Players usually get swooped up in the investing part of the bottom path until they realize they are, in fact, losing money. Our recommendation is to go for the top path, because it’s the singular purpose of this tower: making you money. | + Important in all games, especially multiplayer + Profitable – Not too great bottom path – Slow money generating at first |

| To unlock the tower: 1300 Tokens To place in-game: 600 Cash | A great early-game tower that easily gets rid of groups of enemies. Its range is large enough to cover everything you might need at the start of the round, even though its piercing damage isn’t that high. Place it on a spot with no obstructions and watch as you easily advance into mid-game. | + Great crowd controlling and damage + Ideal for a beginner player – Bad in Expert – Low defense piercing |
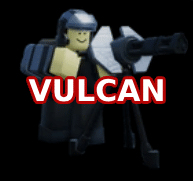
| To unlock the tower: 3000 Tokens To place in-game: 2500 Cash | A good mid to late-game choice. You can choose whether it shoots multiple enemies or focus on getting stronger. The second option is better, because it will prove you just how strong this tower is. Don’t be disappointed by its initial damage, since the max level on the bottom path offers a whopping 140 DPS and full defense pierce. | + Very strong + Versatile – Becomes strong very slowly – Lack of flying detection |
| Tower | Cost | Explanation | Pros and Cons |
|---|---|---|---|

| To unlock the tower: Complete the contract To place in-game: 800 Cash | This tower helps farm money without a Market but also plays a role in damage dealing. It’s also good combined with Recon Base, but that’s s far as it gets. Market is more profitable for money, and there are multiple stronger towers who can deal different types of damage. | + Both makes money and deals damage + Alright for early game – Easily replaceable |

| To unlock the tower: 3500 Tokens To place in-game: 900 Cash | A good early-game tower that easily handles enemies in groups, along with high piercing damage. However, as you progress in the round, more profitable options appear that quickly make Demolitionist obsolete. Also, this tower has no flying detection. | + Good crowd control and piercing damage – Not useful after early-game – No flying detection |

| To unlock the tower: Complete the contract To place in-game: 1200 Cash | Similar to Vulcan, but not as versatile. If you’re looking to use the most of it, take the bottom path. It also has an absurdly long cooldown timeout, so be mindful of how you use this tower. | + Good bottom path – Long cooldown – Expensive |

| To unlock the tower: Complete the contract To place in-game: 480 Cash | Good for mid-game, but nothing before or after it. It has a variety of turrets at its disposal, but only the Teslas make an impact, and only to some enemies. It’s also very costly, despite its turrets being a good game strategy for some players. | + Good for mid-game – Cost inefficient |

| To unlock the tower: Free (available at Level 10) To place in-game: 400 Cash | A Melee tower that can handle groups of enemies and early-game in general. It can also handle tanks. It would be a great tower if its range wasn’t so small. It’s also very slow, something that just doesn’t work for a melee tower. | + Crowd controlling + Early-game efficient – Small range – Slow |
| Tower | Cost | Explanation | Pros and Cons |
|---|---|---|---|

| To unlock the tower: 200 Tokens To place in-game: 400 Cash | An alright choice for a beginner player, or somebody who needs an alternative to Slinger in early-game. Crossbower, except its large range and handling groups of enemies, can’t accomplish much. Its biggest flaw, perhaps, is the unexpectedly low damage it deals throughout its upgrades. | + Cheap, alright for a starting turret + Long range – Unusable after early-game – Bad damage |

| To unlock the tower: 450 Tokens To place in-game: 400 Cash | Paired with other towers that have high DPS, Freezer could be a good tower. However, if you’ve already reached the point in which you can combine towers, it’s better to use your money in a better combination. Freezer does work well with fast enemies, but once the enemies develop freeze immunity, it’s essentially useless. | + Good for fast enemies – Becomes obsolete after early-game – Can handle only certain enemies |

| To unlock the tower: 500 Tokens To place in-game: 400 Cash | Another Melee tower that’s not fast enough for all the oncoming enemies. Really bad range that can be improved by taking the top path, but at the cost of lowering the already low damage it deals. It only makes sense using this tower in Normal. | + Somewhat okay top path – Small range – Unusable in Hard or Expert |
| Tower | Cost | Explanation | Pros and Cons |
|---|---|---|---|

| To unlock the tower: Free To place in-game: 200 Cash | Slinger is a beginner tower for a reason. It serves a good purpose of introducing the game to new players, but that’s about it. Place it in the first wave as a starter tower and then get rid of it as soon as possible. | + Free – Terrible damage and shooting speed, even after max level – Unusable after the first few waves |

| To unlock the tower: 1000 Tokens (available at Level 10) To place in-game: 500 Cash | Considering its unlock cost and level requirement, you wouldn’t expect to get a tower that seems to be having issues with defeating even the weakest of enemies. There’s no reason to place Trapper at any point when you can place other towers that are both stronger and cheaper. | + Somewhat decent bottom path – Not cost efficient – Often almost unusable – Struggles during the entire game |
Now that you’ve seen our tier list of all the towers in-game, you have everything you need to find the best strategy for your play style. If you need a little head start in the game, our Tower Blitz codes can help you out.
Click here to view the article...
